ezBond Orthodontic Positioning Guide A New Era of Digital Orthodontics
Combining modern oral medicine, computer-aided 3D diagnostics, personalized design, and digital forming technology to achieve fast and accurate bracket bonding, while providing professional data for dentists
Why Choose ezBond
Comprehensive orthodontic advantages supported by digital technology, benefiting both doctors and patients
Digital tooth arrangement positioning goes directly to the target, reducing patient orthodontic treatment time by approximately 38%, improving clinic efficiency.
Proprietary technology extracts root bone via CBCT to precisely determine long axis position, safely managing thin bone walls or tilted roots with technological risk control.
Uses original 1:1 orthodontic wire for arrangement. Doctors no longer need to bend arch wires, just replace wires as needed.
Custom orthodontic appliances and torque made entirely according to each patient's needs, reducing bulk and protrusions for oral comfort. Brackets stay put without re-bonding.
References the ABO-OGS eight evaluation indices as design criteria, with adjustments based on each clinician's individual requirements.
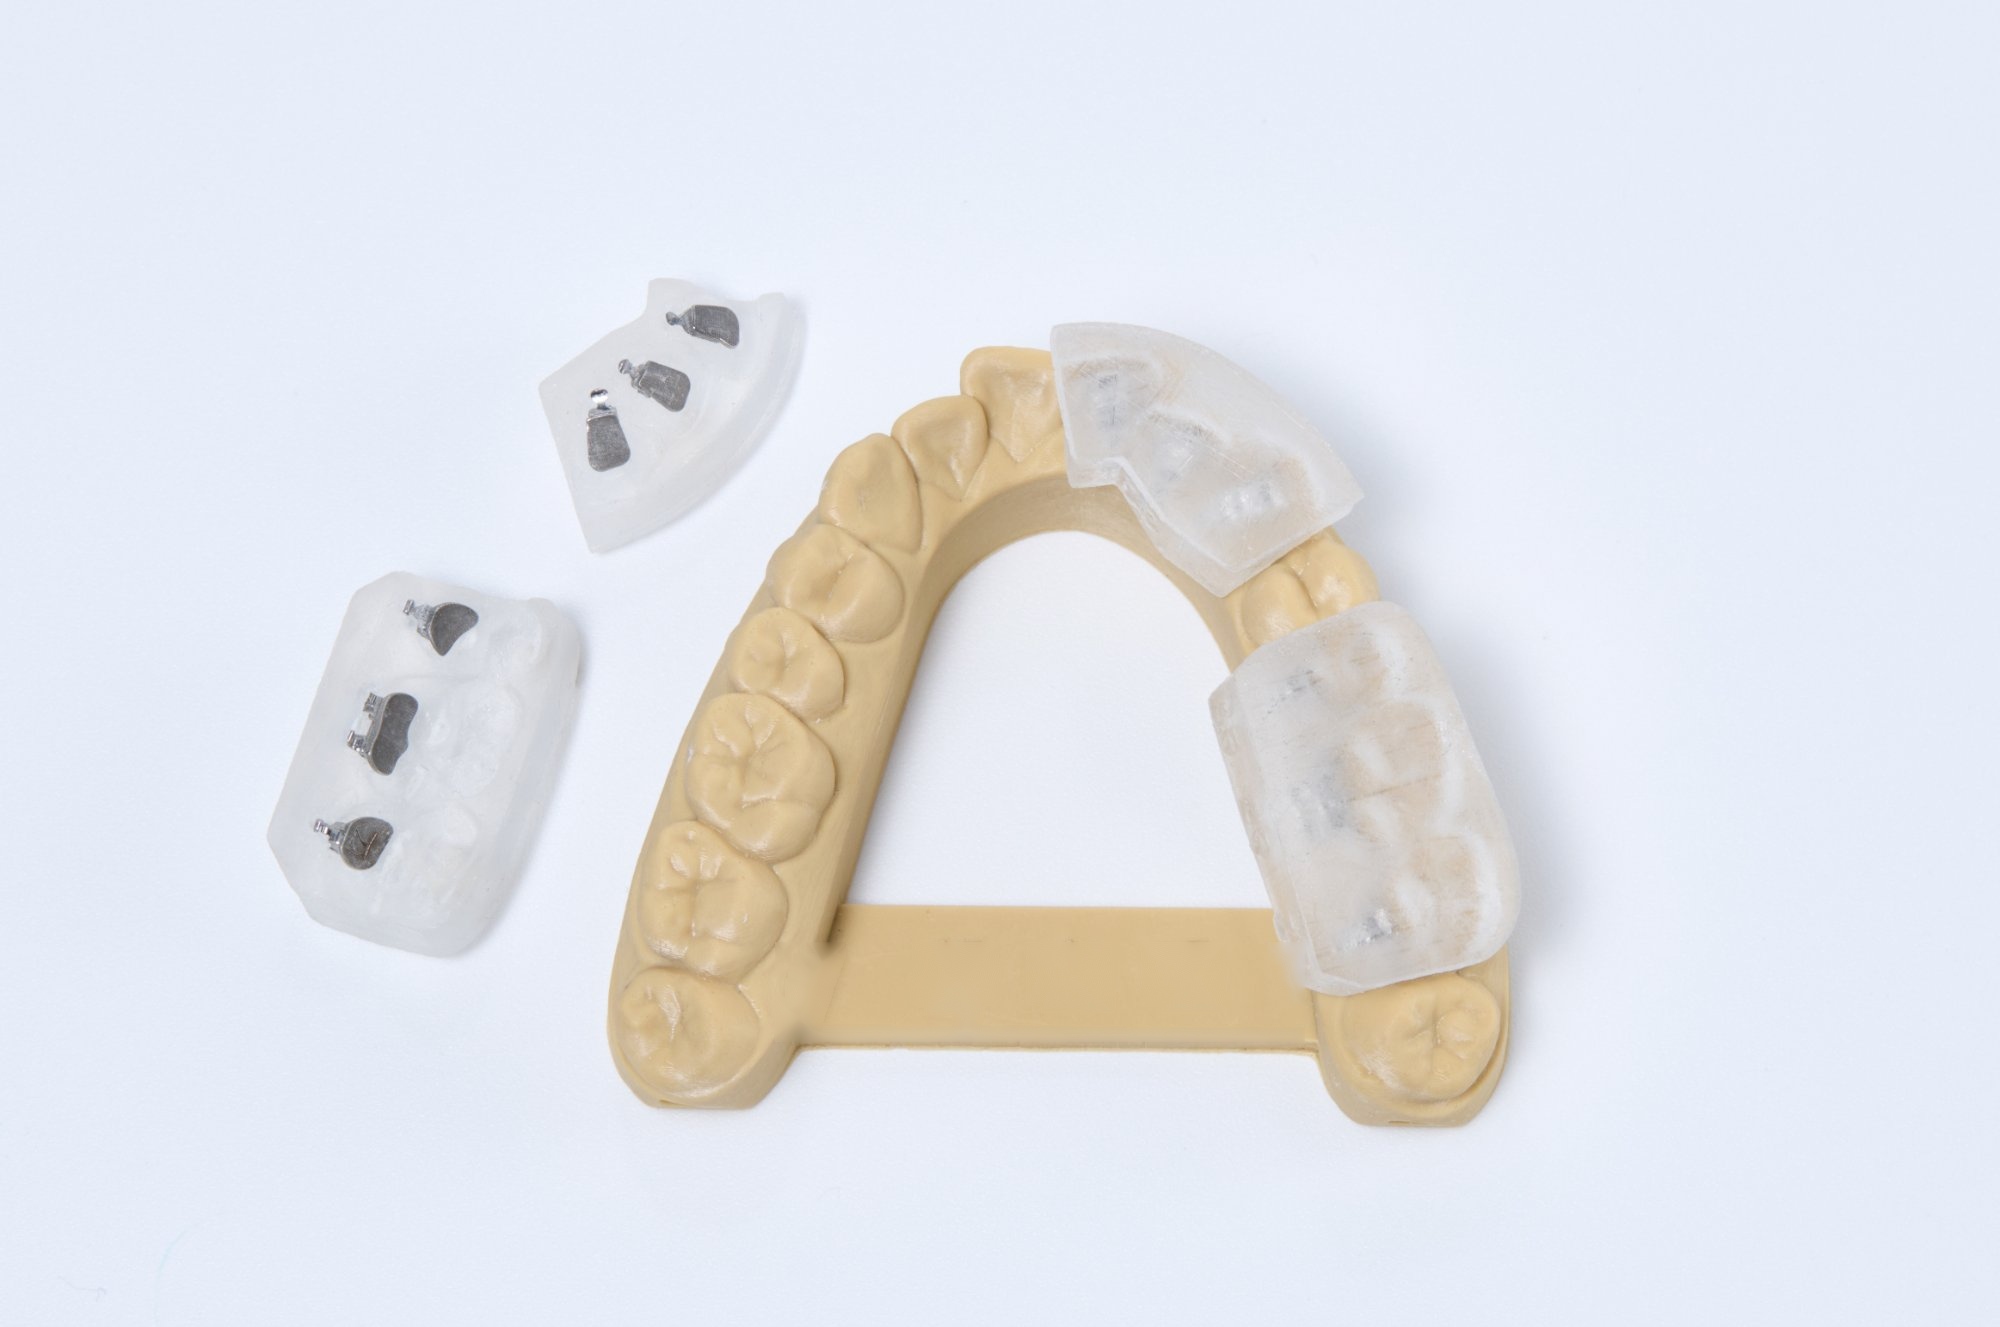
Medical-grade guide material, safe and reliable, does not bond with adhesive, easily cleaned, ensuring precise transfer of bracket positioning into the oral cavity.
Precision Product Design

Medical-Grade Guide
Precision Transfer Technology
Medical-grade material is safe and reliable, does not bond with adhesive, and excess adhesive is easily removed with a cotton swab.
- Precision Positioning GuideGuide and model fit precisely, achieving near-perfect seal
- Three-Sided Edge Seal DesignNo adhesive leakage, brackets stay precisely fixed without shifting
- Medical-Grade Resin Easy RemovalBrackets remove easily with no adhesive residue
Fully CNC Machined
Personalized Manufacturing
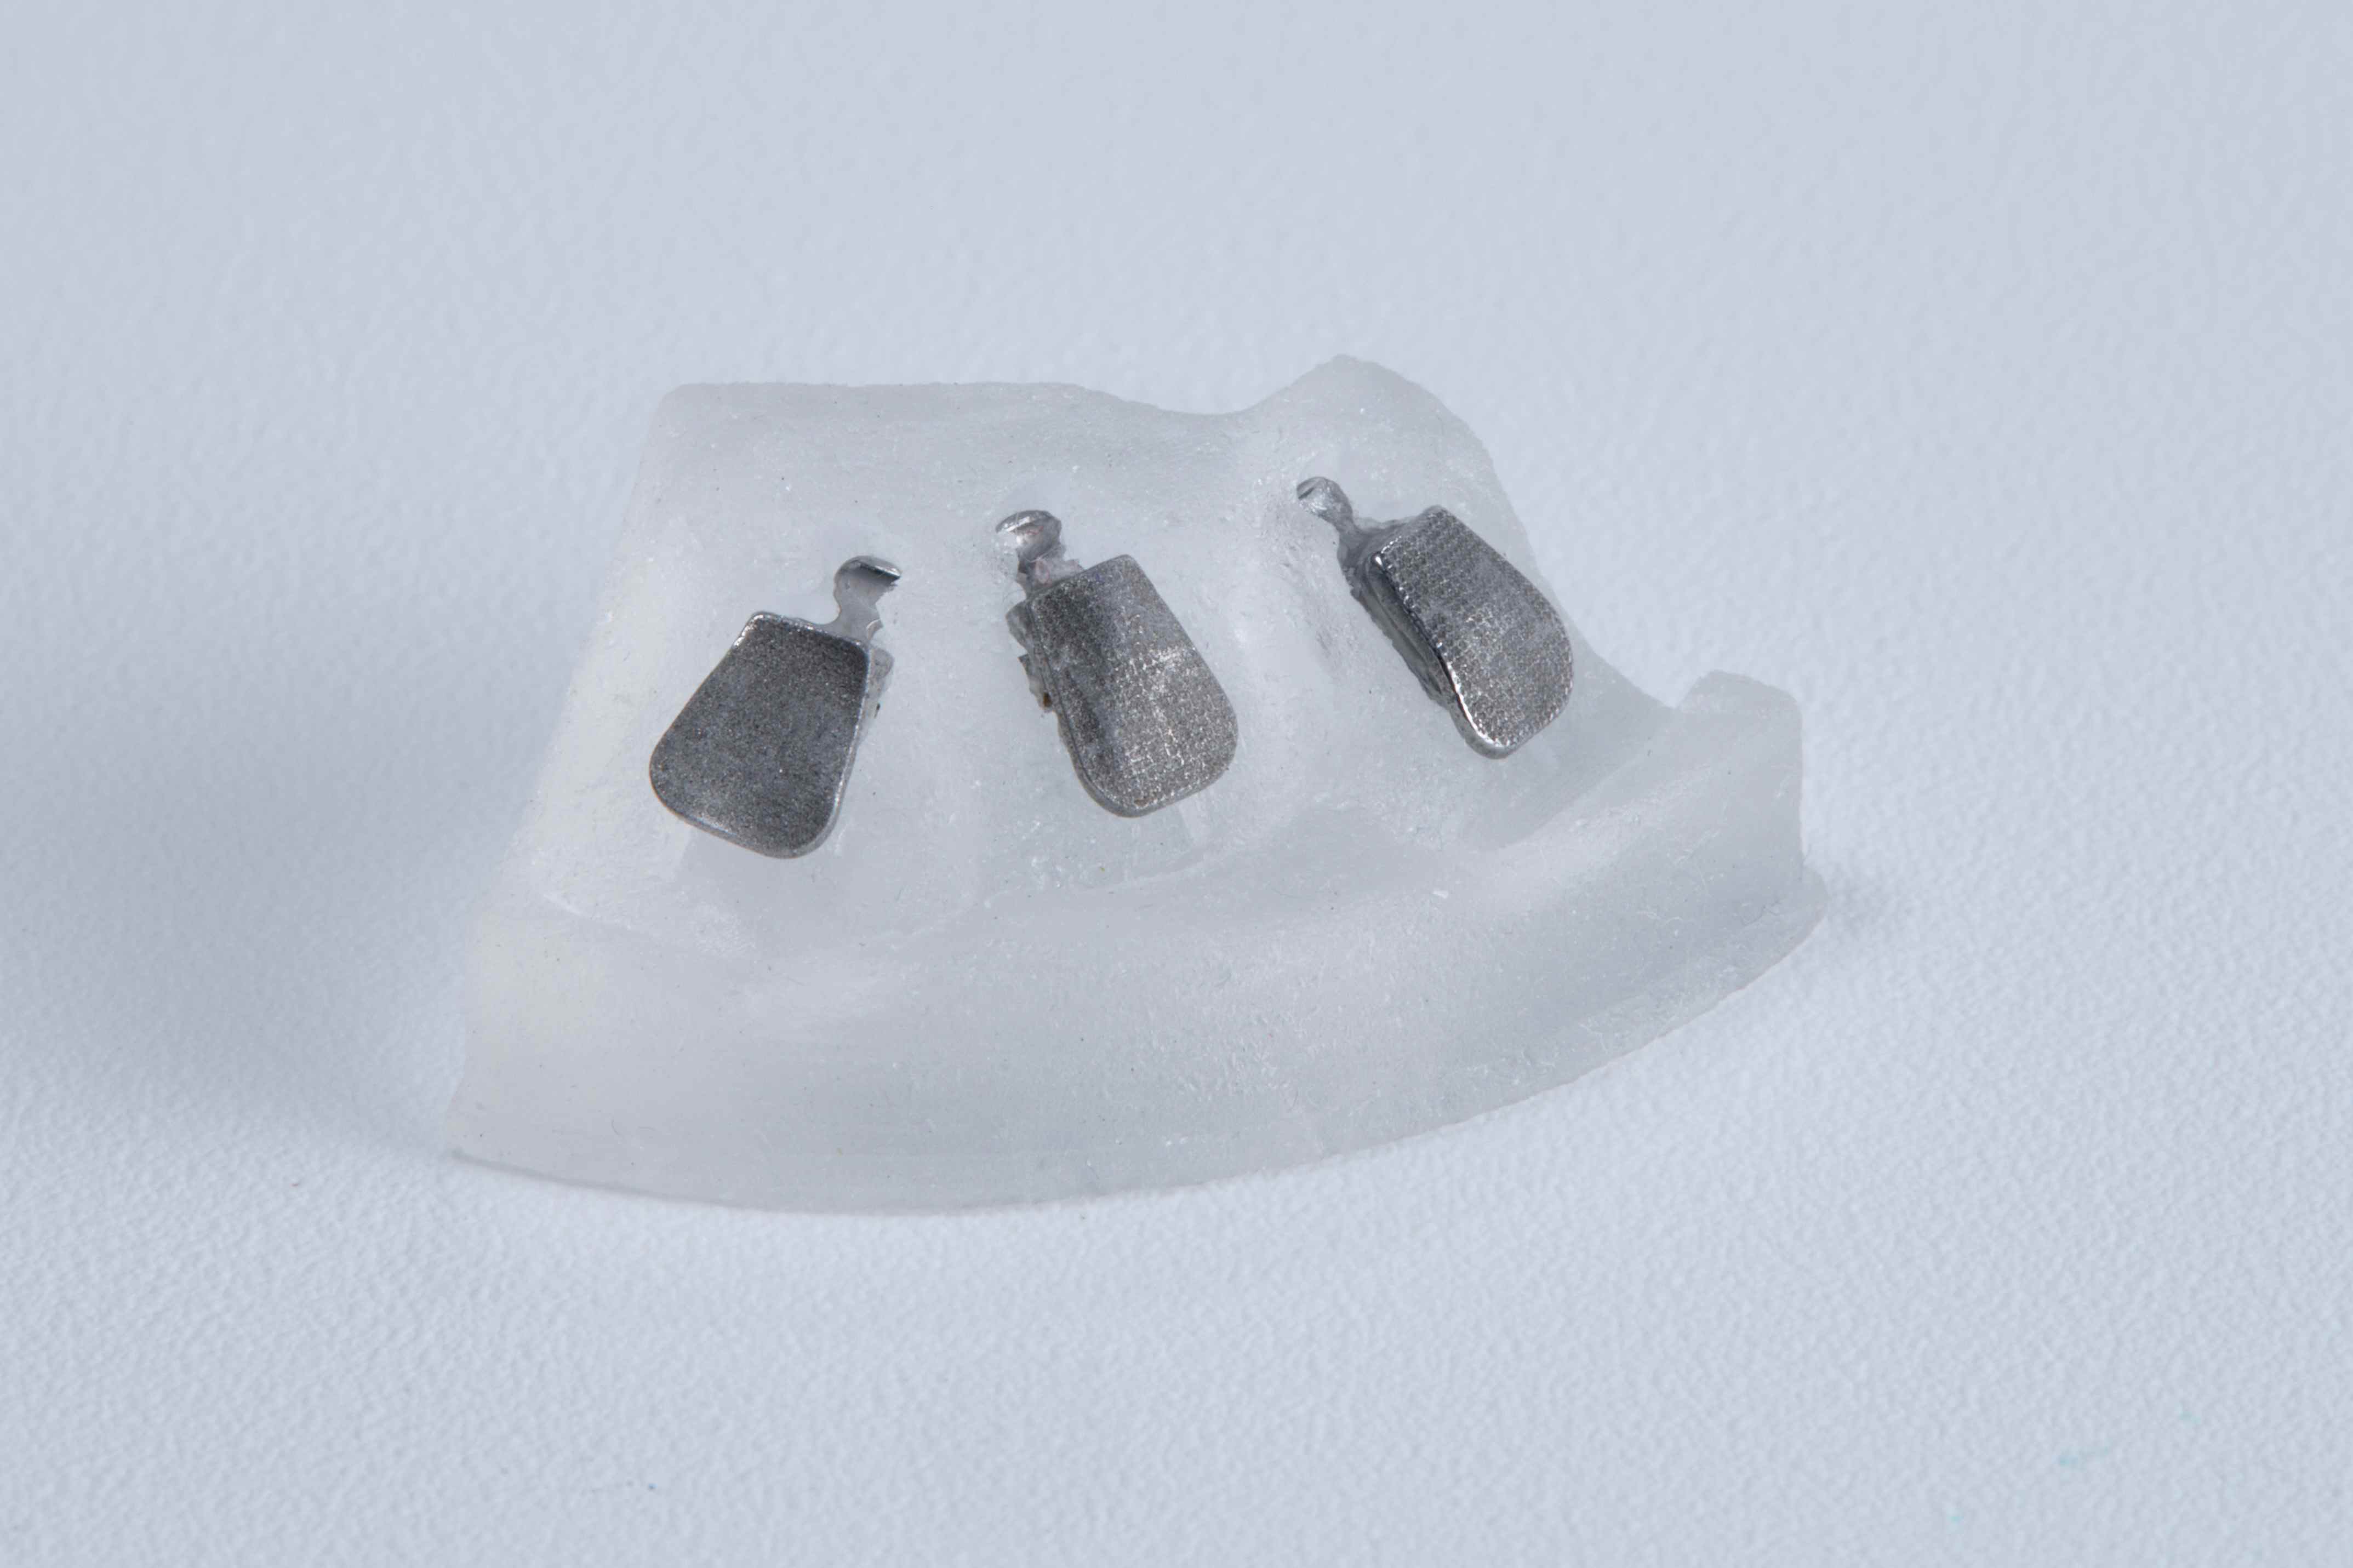
High-tech 3D tooth arrangement positioning, generated from the tooth surface upward, using fully CNC-machined personalized brackets.
- Personalized Slot DesignPrecisely designed slot dimensions as needed, smooth sliding mechanism
- High-Tech Mesh Base TreatmentHigh-tech laser-treated rough surface for better tooth bonding, superior adhesion strength
- Ultra-Thin DesignMinimal thickness for maximum patient comfort, personalized torque, bonds and stays put
Archwire Replacement Flow
Using straight-line sliding mechanics, doctors don't need to bend archwires — simply replace them in sequence to complete treatment
LH archwire can be placed from the beginning of treatment, used throughout until completion, completely replacing all the above replacement steps, greatly simplifying chairside operations.
ezBond Product Series
Choose the orthodontic plan that best fits your needs — from precision tooth arrangement to cross-positioning, fully digital service
Lingual Tooth Arrangement Plan
Upgraded invisible technology with brackets installed on the lingual side, completely invisible — the best choice for aesthetic-conscious patients
- Original 1:1 arch wire arrangement — no wire bending required
- Medical-grade transfer guides for precise final bracket positioning
- One-time bonding with no re-bonding needed, ultra-thin for maximum comfort
- Digital goal-oriented approach, shortening treatment time to reach targets faster
Delivery Timeline
Plan Includes
- 1One 3D tooth arrangement file (STL)
- 2One set of 3D arrangement models
- 3One set of original dental models
- 4One set of personalized brackets
- 5One set of precision clinical guides
- 6One set of individual backup guides
- 7Installation instruction manual
Manual Bonding v.s. Tray Bonding
For the same 28 teeth, tray bonding completes in 6 segmented groups, saving over 2/3 of operation time
Higher error rate, often needs rebonding in later stages, relies on accumulated skill
Digitally precise and consistent, any dentist can achieve equal results
Digital Orthodontic Workflow
From order to chairside installation, fully digitally managed
Order & Scan Documents
Select a plan, fill in basic information, upload patient photos and dental model files, and provide initial treatment concepts.
Digital Tooth Arrangement Design
Create dental scan files and perform precise tooth arrangement design based on patient dental conditions and final orthodontic goals.
3D Printing Production
After the doctor confirms the design, precise 3D printing is performed with medical-grade materials to create positioning guides, which are then shipped to the clinic.
Chairside Installation Complete
The doctor installs according to the guide. Simple operation, easy removal of excess adhesive, effortless chairside work, completing precise orthodontic positioning.
Elevate Your Orthodontic Practice with Technology
Contact us to learn how to integrate digital orthodontic technology into your clinic